I didn't take individual photos of all the fabrics I picked up. I selected what I liked from the line -- 1/2 meter cuts of all of them -- and then asked Cheryl to look up another quilt I had done for the border fabric. 1.6 meters of that one.
Then I came home and did some thinking. I came up with nothing, so I went on the Northcott website to see what they suggested. There were three patterns to choose from and I selected this one.
mainly because it is Canadian and she is fairly local. I ordered it on a Thursday and it was in my
mailbox the following Tuesday. I was very impressed.
I did find a couple of puzzling directions in the pattern, so I took a break, put my brain back in order, went downstairs, and finished the top.
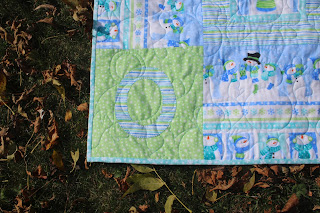
I couldn't do her pattern to the "T", as I didn't have enough border fabric. I opted to do cornerstones with one letter per corner.......S.......N......O......W and I even remember to turn the first two letters so they would be in the right direction.
The day I took the quilt outside to snap some photos was really bright and sunny so of course, we got shadows. These were the best photos of all, until of course, it was all bound and then I got a really, really good one.
I ran out to the store on the next Tuesday to get some backing fabric......3 meters of it......2 meters of one fabric, one meter of another. I had a plan!!
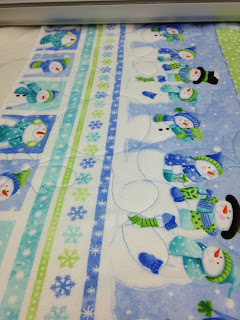
 We threw it on the frame on Wednesday morning and used this panto. Anne had a panto in her files, but did some fixing up..........different hats for one thing and it made up quickly. I think it was about 12 minutes per row.
  Because this was flannel on both sides -- it will be so cozy and warm for someone this winter -- I pressed every single solitary seam flat. Of course, I didn't think to take photos until the quilt was on the frame!
I had a bit of green fabric and a lot of turquoise fabric left over so I decided to use both fabrics for the binding.
I found the middle of the quilt, down both sides, and marked it with a pin. 33.5"
Then I measured from one pin all the way around to the other pin. Rats! I didn't have enough. So I had to play. I started 10" up from the pin and stopped 10" from the pin on the opposite side.
I stitched it down in place and left it and started with the turquoise binding. I knew when I was finished that there would be more turquoise than green but that was okay. I just knew I had to stop and sew the bindings together along the sides at the same spot on each side.I opted to do a straight join instead of a right angle.
I pressed the two bindings and then carefully marked them. I made sure those markings matched up before I stitched them together. For me, it had to be right on.
Here you go. The finished quilt........front and back.......and the wonderful pattern just pops right out.
I think it was about 450.
You can read here how to do fonts on your computer for your quilting.
Someone asked me why I had the "S" and the "N", going in the wrong direction. They thought they should be facing the same way as the "O" and the "W".
I did it this way as that is the way the border fabric was facing AND
when you lay down and pull the quilt up to your chin
both the border and the letters will be facing you.
She didn't get it!
It is called artistic license.


