
When Karl and I were up in New Hamburg, I bought 4 pieces of fabric. 2 for a boy's quilt and 2 for a girl's. Esther has the best selection of children's fabrics and I really love dropping in to see what she has in stock when I'm in the area. That's the store......Heart'n Home Creations on Peel Street

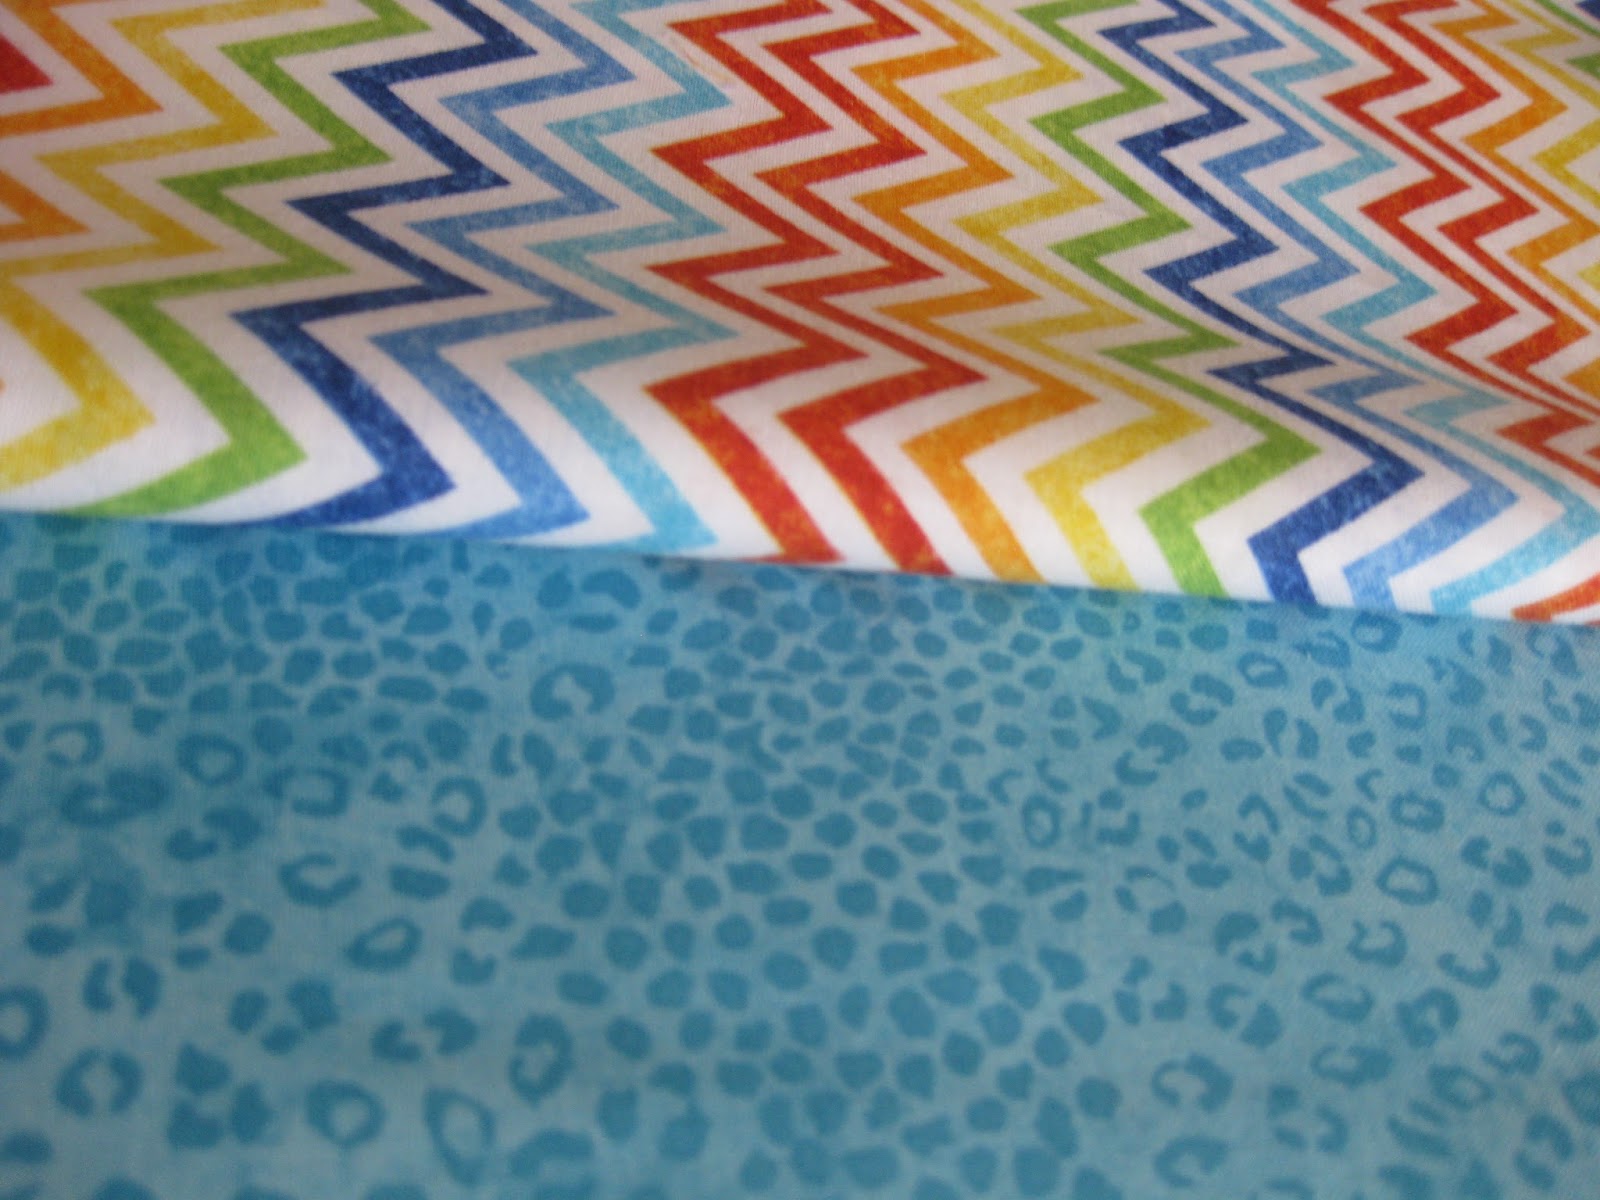
These were two of my choices, one is......well, you can read....

Look how well they go together. Esther had them on the shelf side by side.
I opted to try this after I had run it off from EQ. I don't mind doing a trial block on paper and then I even did one with scrap fabric.
My blocks were cut 6" square which would give me an 11.5" block when this step was done.
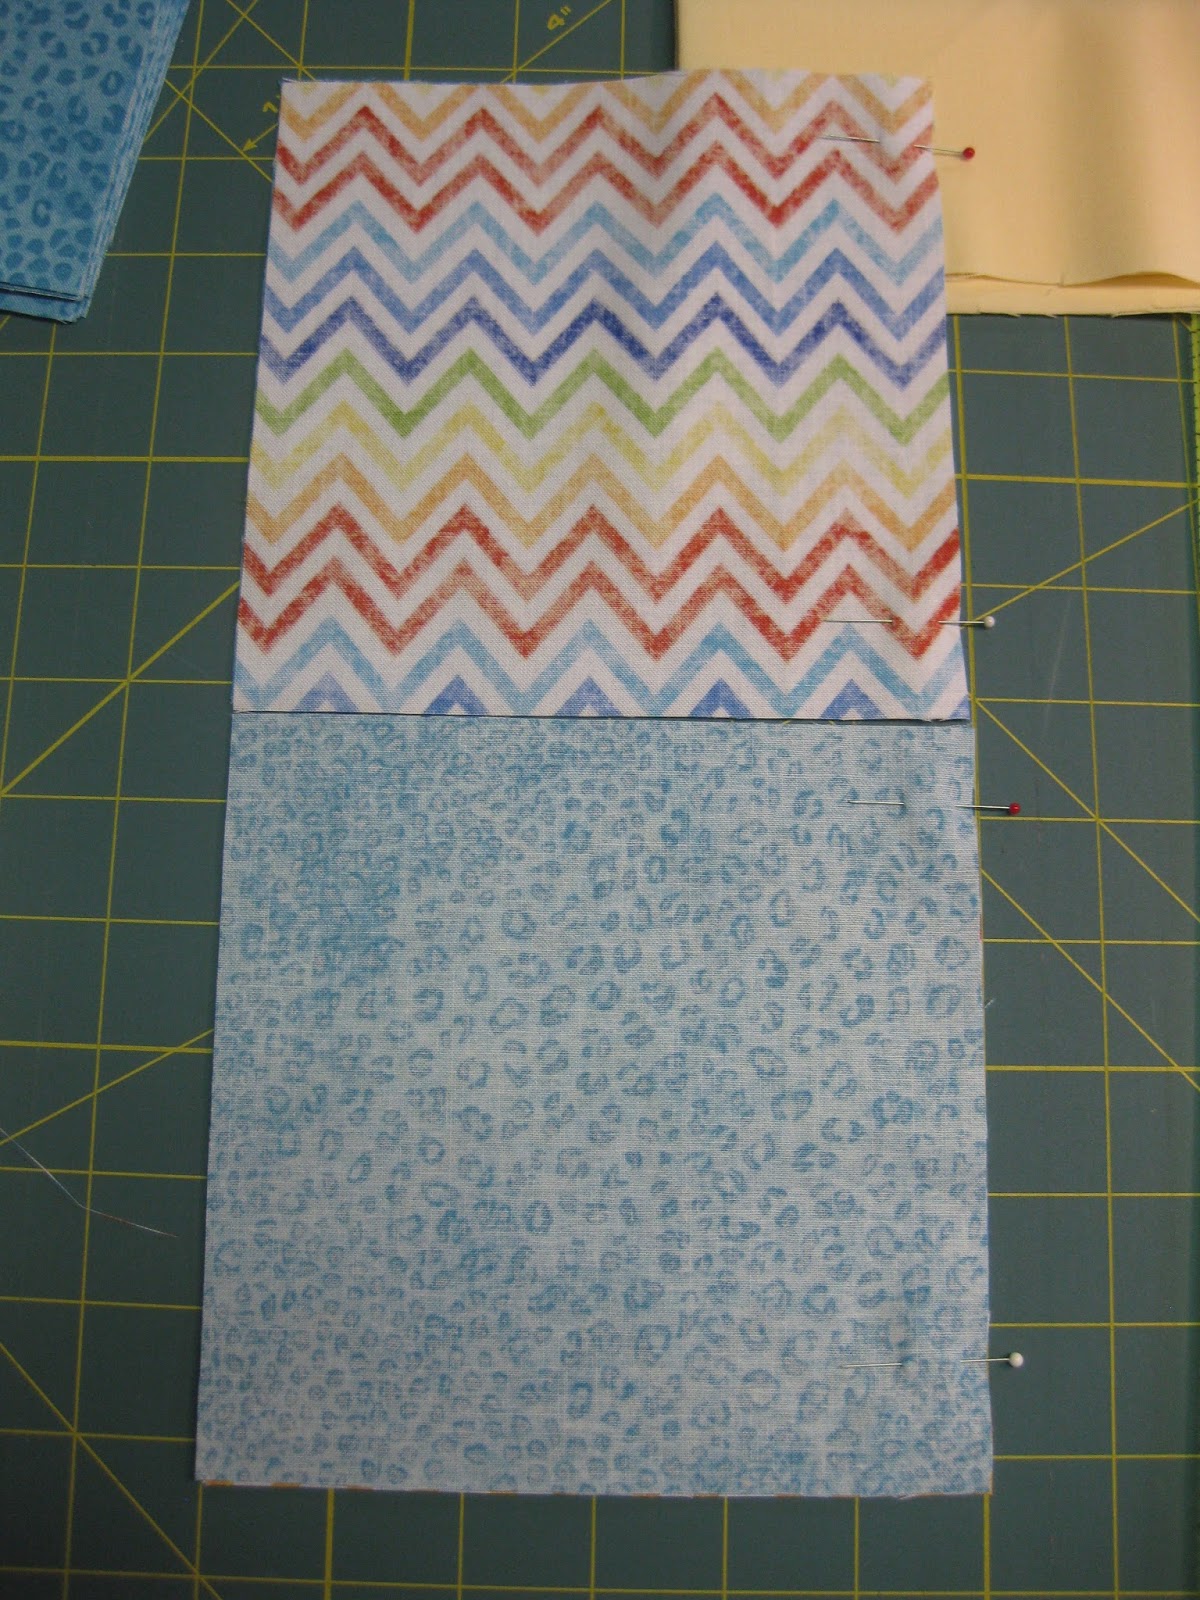
I sewed them exactly as you see them lying here.
I didn't cut the stitching between the two blocks.

When I placed them on the ironing board I flipped one over to get the "dark" fabric on top. I set the seam and then pressed to the blue fabric.

This way I could nest, butt, call it what you will, the set together along the final join. I do pin that spot. I pin it so I don't have to remove it.


When that was done I pressed it again.

and then placed it on my rotary cutting mat.
I laid my ruler at the 1.25" mark along the seam line and cut.

Then I rotated the board and the same thing again on the other side.
That was all the cutting I did. Two slices with the rotary cutter.

This is what you will have when you are done.
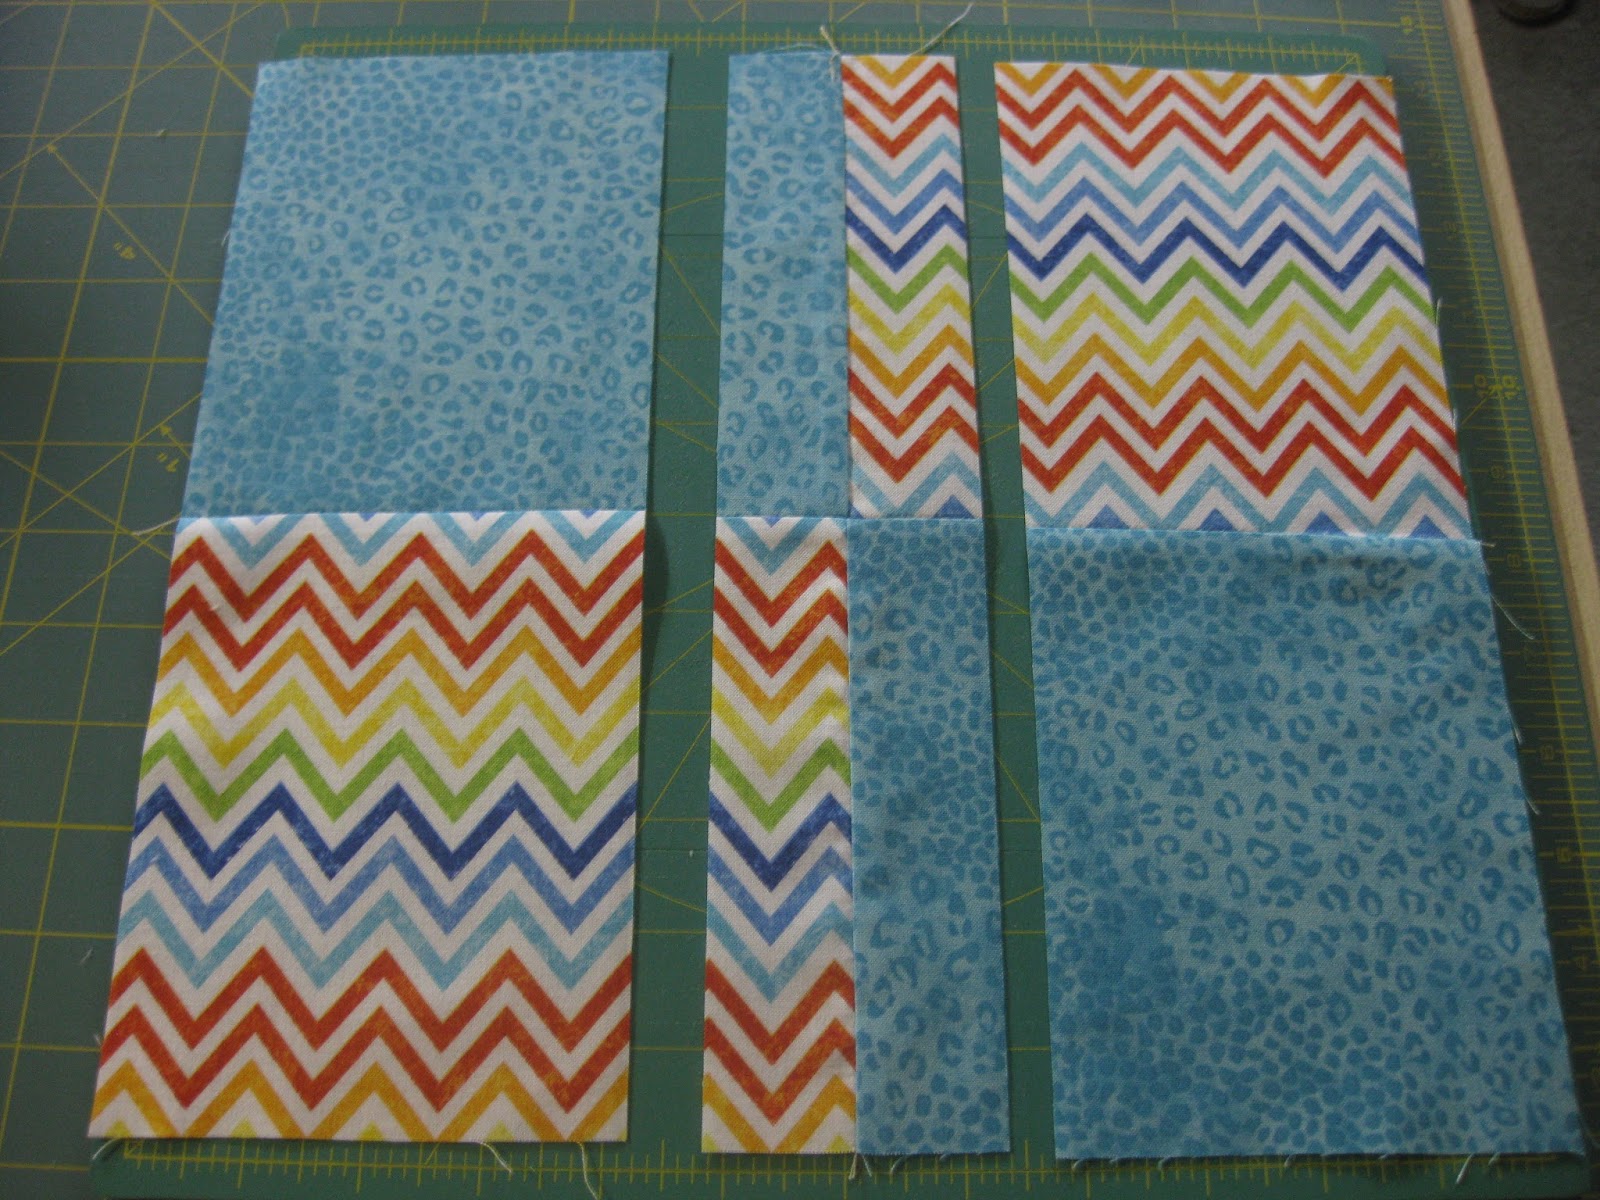
 I took the centre piece and turned it. I took the top and rotated it so it was on the bottom. A half turn. The fabric will be the same on the bottom as it was on the top.
 The reason for doing this ..... you want the seams to butt up against each other. If you don't move the centre piece you won't be able to do that.
Next you take the right piece and put it on the left side and the left piece and put it on the right side.

Then you pin and sew them together. I pressed the seams towards the centre. It probably doesn't matter but mine seemed to want to go that way. Finished one block -- now onto the other 8!

Tuesday, the finale!
and Wednesday is another "freebie".